
When you visit Walt Disney World frequently there is one thing you end up with tons of—MagicBands! You can order them through the Disney World site. Once you receive them in the mail the next fun thing to try is decorating them. You can order professionally made skins from many different companies online, but I think DIY decorating is pretty fun! I used only items I found around my house to decorate these bands.
Disclaimer- I am not a great artist. If I can do this you can too! If you can freehand a perfect Queen Elsa with a Sharpie this post is likely pretty basic for you, as your artistic skills greatly exceed mine.
Materials I used:
- Sharpie marker
- Fingernail polish (clear and glitter)
- Nail art stickers
- Disney stickers
- A small jewelry or eye glasses size screwdriver
- Glow in the dark tape
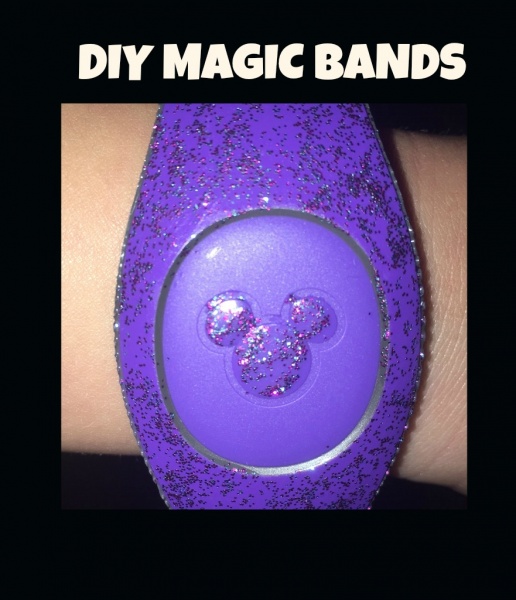
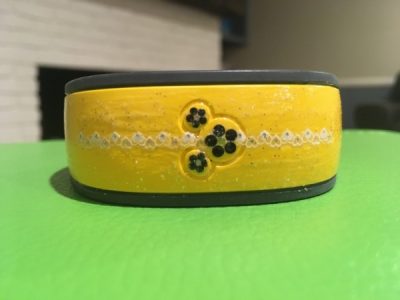
Option 1) Sharpie + glitter nail polish
Option 1) The first option in the picture listed above uses glitter fingernail polish on the band with the Mickey head outlined with black sharpie. This option works well if you’re planning on going to one of the Disney Water Parks because the decorations are water proof. I decorated this band 2 years ago and it’s held up quite well to several Disney trips.
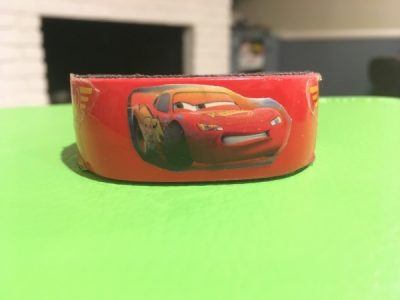
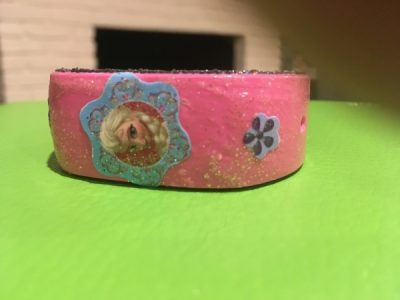
Option 2) Disney stickers + clear or glitter nail polish
Option 2) If you have kids you likely have lots of Disney stickers sitting around your house. We found many options in old sticker coloring books. I let my kids pick their favorite Disney characters to use for their MagicBands. Then I painted a few coats of clear nail polish over it. My kids LOVE this. Even after the new version 2.0 MagicBand was released my 5 year old daughter only wanted to wear her old Elsa sticker MagicBand. Warning- I would not recommend this option if you are going to wear the MagicBand while swimming or in the water parks. Also this option will likely start to peel over time. After about 1.5 years I needed to touch up the stickers. This is not a big deal as the stickers will easily come off if peeled and you can change up your sticker decor if desired. Note- It’s fine if you cover up your Mickey Head with a sticker, the sensors to get in the park are not phased a bit and scan perfectly right through the sticker.
Option 3) Using nail art stickers + clear or glitter nail polish
Option 3) Nail art stickers are an easy and more “adult” look to your magic band. You can easily add stickers to decorate your band and then just add clear or glitter nail polish to complete your look. Make sure you always add the coating of nail polish as the stickers will easily fall off if you don’t have something to help keep them attached.
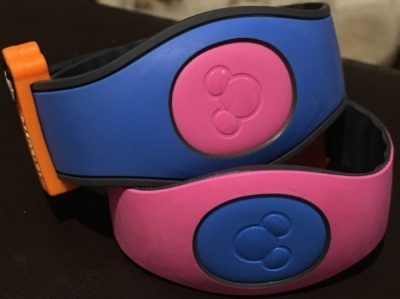
Option 4) Switching the center icon
Option 4) If you really want to keep it simple, but have a distinctive magic band around the park, consider removing the center icon and switching it with a different band color. The default setting that Disney will send you will have the same center icon color as the band (ie pink with pink). However, the center icons are removable with a small screwdriver so you can mix and match and create a custom look in about 5 minutes by removing the screws. TIP- those screws are tiny, make sure you don’t drop them!
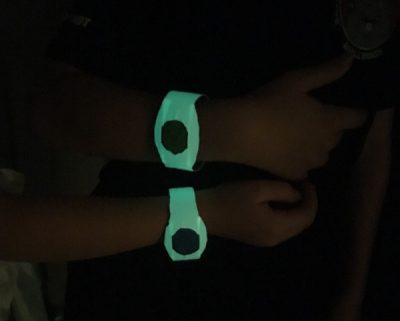
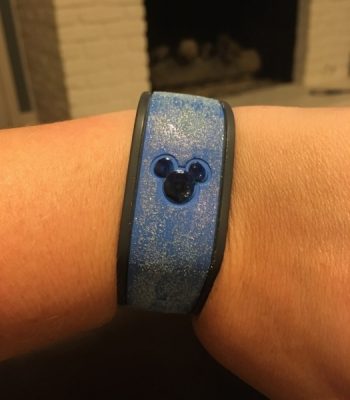
Option 5) Pandora inspired glow in the dark magic bands
Option 5) Our family is planning a trip in June to visit Animal Kingdom’s new world, Pandora. All the bio-luminescent pictures of the new land at night gave me the inspiration for these Magic Bands my kids are really excited about. All I did was to order some glow in the dark tape and add it the bands and carefully cut out the center circle. If you charge in the sun for 20 minutes it will glow for 10-12 hours. My kids LOVE this option.
By the way, all MagicBands that will be shipped for any upcoming vacations will be the ones pictured in Option 4 and 5. They are the MagicBand 2.0 version. All previous MagicBand 1.0 versions will continue to work as long as the battery life is still good. I haven’t had a battery die yet, however, if I bring old MagicBands on a trip I always check them on my room door before leaving the room so that I don’t end up with a non-functional MagicBand.
Finally remember to have fun! DIY MagicBand decorating has added some special magic to our family’s vacations.
What have you done DIY MagicBand Decorating? Share your ideas in the comments!
Did you like this article? Make sure to share it with your friends! Check below for easy ways to share!
Incoming search terms:
- buildingg6w
- https://www themouseforless com/blog_world/diy-magic-band-decorating/
The glow in the dark tape is especially cool. Thanks for the idea!
So just to be clear – the 2.0 bands can also be painted with nail polish? Are they the same material as the old ones? Thanks!
They are made of the same material and fingernail polish is fine on both!!! Have fun!
Do you happen to know the measurements of the Mickey head in the center of the band?