
When my husband and I found out we were expecting a little boy, I was so excited to start planning his Disney themed nursery! I ended up deciding to go with a Mickey Mouse theme. One idea I had was to make a Mickey Head Pom-Pom Rug. I have seen a lot of ways of how to make one of these rugs in general, but I haven’t seen one specifically for Mickey Mouse.
Here are the supplies you will need:
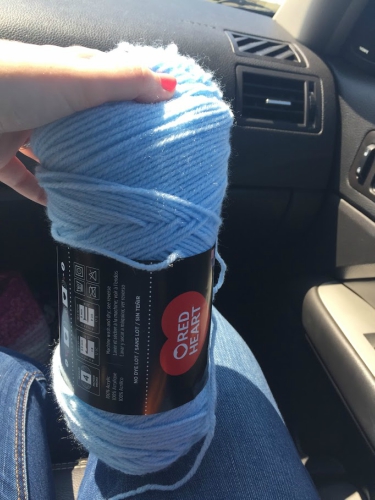
-Yarn: This will depend on how many colors and how big of rug you want to make
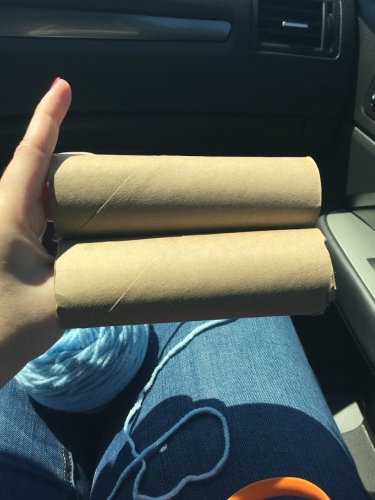
-2 toilet paper tubes or 1 paper towel tube
-Scissors
-Rug mat
Step One: Making the Pom-Poms
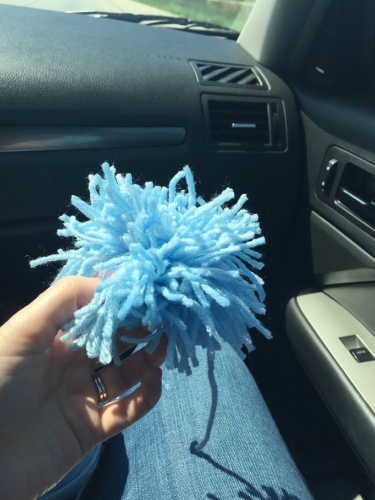
Actually making the pom-poms is really easy and can be done about anywhere. This was so easy to do that I worked on it during a long car ride! I had no idea of how much yarn I would really need to have to make the rug. I knew I wanted the rug to have three different shades of blue. Let your imagination guide you! Any colors can be used. To start with, I used three skeins of yarn of three different colors. Well this wasn’t enough for the size I ended up making my rug. In the end, I used nine skeins of yarn in the three different colors. Depending on the size you want to make your own rug, you will have to adjust from there.
To make the pom-poms you will either need two toilet paper cardboard rolls or one paper towel cardboard roll cut in half.
Grab your yarn and start wrapping around your two cardboard rolls. Make sure you trap your starting piece of yarn in your wrapping to secure it in place. I ended up wrapping around both cardboard rolls about 90 times. These make pretty large pom-poms. Again, you can adjust based on the size you want to make. Don’t fret about it always being the same amount you wrap, it will look great!
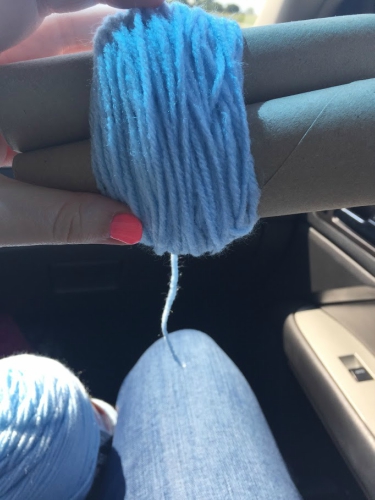
After wrapping around the cardboard rolls your desired number of times, cut your yarn leaving a tail of about 5 or 6 inches. Cut a single piece of yarn off your skein, about 10-15 inches. I just eyeballed cutting my yarn. Take that piece of yarn and thread it around your yarn on the cardboard rolls from both ends, making sure to trap the tail piece of yarn to keep it secure. Tie the loose piece of yarn around the yarn you just wrapped around your cardboard rolls. You don’t need to do this too tight yet, just make sure you have a firm grip.
Slide the yarn off the cardboard rolls still holding on to the loose piece of yarn tied around it. Once you have successfully pulled it off, tie your loose piece of yarn really tight around your ball of yarn. I tied mine three or four times just to make sure it was secure.

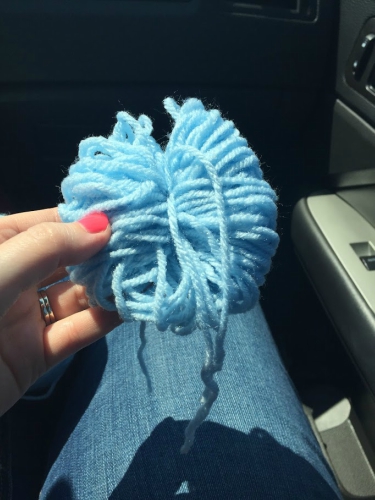
Next, you want to take your scissors and cut the ends of the looped yarn. Be careful not to cut your tied knot or your loose ends hanging off. Fluff out your pom-pom! Continue making more pom-poms.
Step Two: How to get the shape of the rug
This next part I did not have any kind of template to go off. If you do not like the size of what I made, just adjust it one way or another.
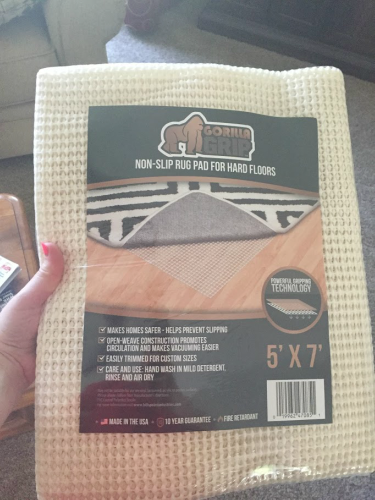
I bought this non-slip rug mat for my rug. I got a really big size because I wasn’t sure how big I would make it or if I would want to make other rugs.
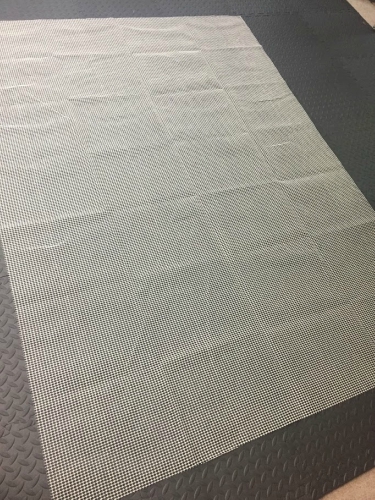
Lay out the mat on a flat surface. You may want to put cardboard or paper under the mat,so the tracing doesn’t get on the floor.
For the head, I ended up making it 24 inches in diameter. I tied a piece of string onto a marker and cut it a 12 inches. You might want to have someone help you with this next part. Place your marker on your mat directly in the center and draw your circle.
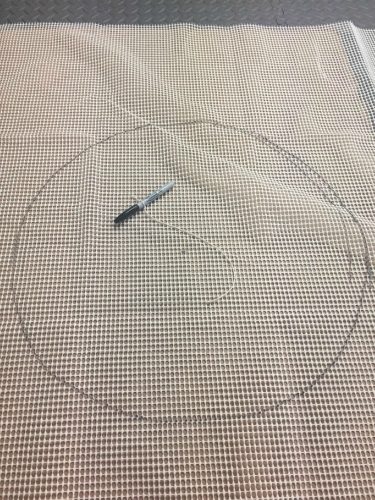
I found the ears to be a bit more tricky because I couldn’t really use the same technique. The ears need to overlap over the head a little bit to make the correct shape of the Mickey head. I found an old lamp shade that was 13 inches in diameter and placed that on the side of my ear. I used a yard stick to make sure I knew where to find the middle.
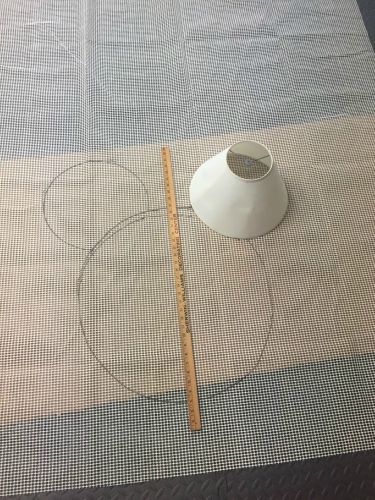
When you draw the second ear, go back to the first and count how many open squares you have from the yard stick to the beginning of the ear so you know where to place your round object for the second ear.
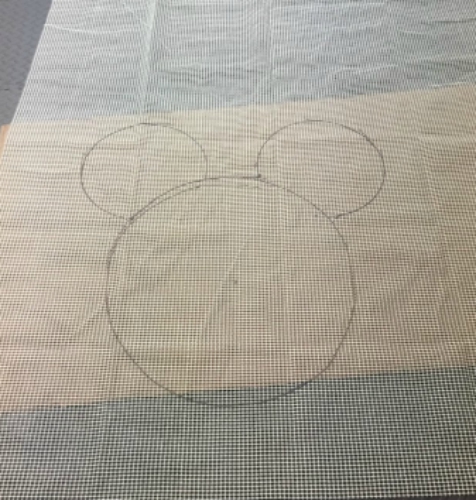
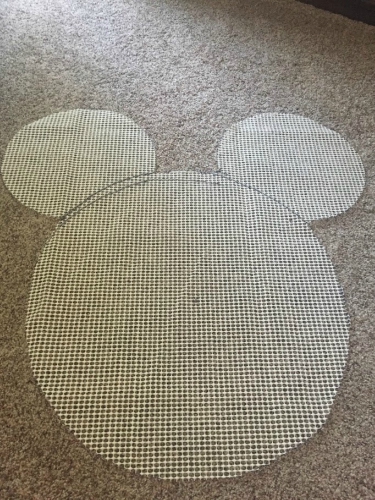
Step back and look to make sure it’s the size you want and in proportion. This can always be adjusted if you don’t think it looks right. Cut out the Mickey head once it is the size that works for you.
Step 3: Attaching the pom-poms
Remember all those pom-poms you made? Now you get to attach them! I started on the left had side with my lightest shade of blue. Take the two long ends of the tail you used to tie the knot in the pom-pom and thread it through the hole in the rug mat.
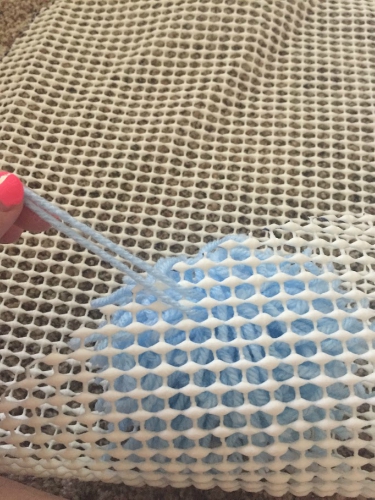
Tie the pom-poms tight and secure on the bottom. Go ahead and start alternating your colors. Make sure they are close enough together when you are tying them on so you won’t see through to the mat underneath.
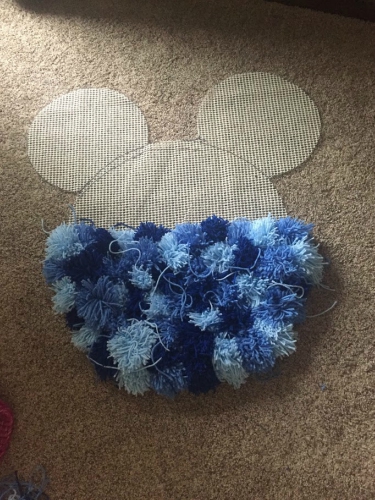
After you are done, fluff up your rug and cut off any long pieces you may have. This is where you can also shape up any of the pom-poms that make look a little off. Step back and enjoy your masterpiece!
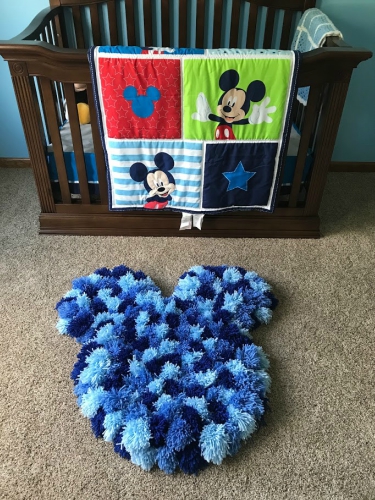
I hope you enjoyed learning how to make a Mickey Head Pom-Pom rug! Share your comments or ideas below on how you would make your own rug special, I would love to hear! Please check out some of my other crafting blogs like how to make a Mickey Pinata over on The Mouse for Less Blog! Please read all the great news, tips, and tricks our other amazing bloggers write about!
Did you like this article? Make sure to share it with your friends! Check below for easy ways to share!
Incoming search terms:
- https://www themouseforless com/blog_world/make-mickey-head-pom-pom-rug/
- how to make pumpum
- pom pom mickey