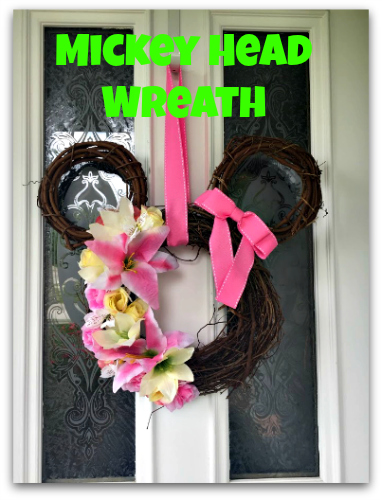
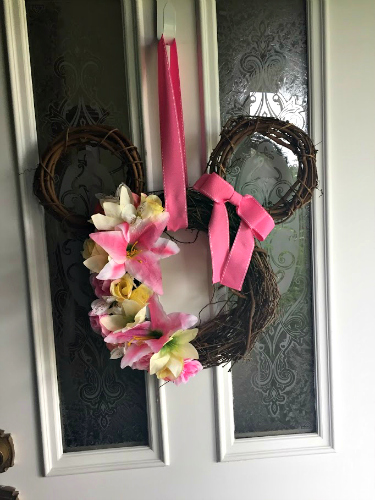
As you host family and friends this summer, invite them in with a touch of Disney magic with a Mickey Head Wreath!
The wreath I am going to show you how to make is really easy and anyone can do it. I set out to make something easy and low cost.
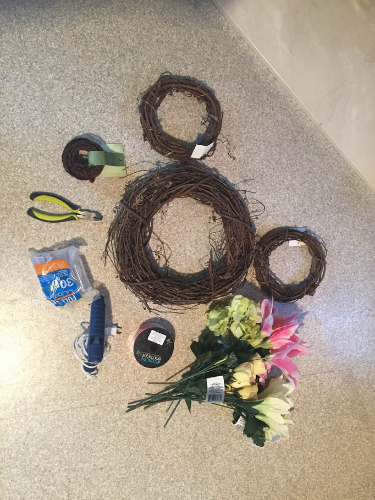
Supplies I used:
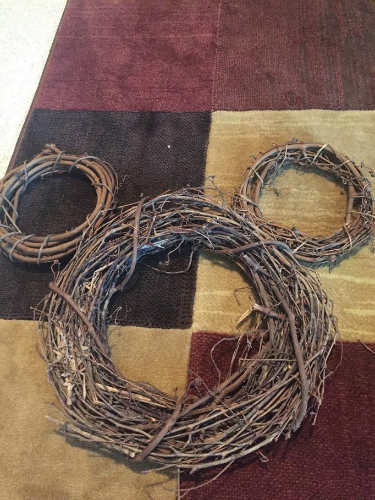
- Grapevine wreaths- 1 large and 2 smaller
- Flowers (or other decorations)- Assorted mix
- Wire
- Wire cutters
- Glue gun
- Ribbon
- Scissors
- Measuring tool
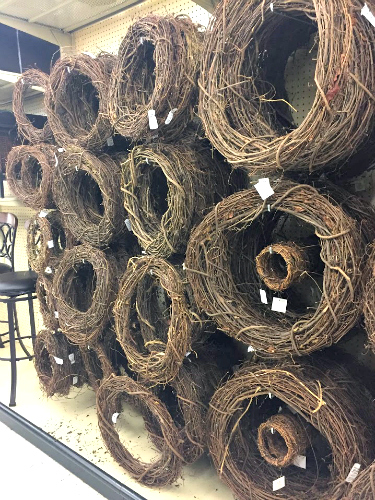
Step 1- Gather All the Supplies
I headed to my local craft store to find some grapevine wreaths. The ones I found were $2-$3 each. They had a ton of different sizes. You are able to make whatever size would fit your needs best. Make sure you check for any coupons from the store you are shopping in to save some money!
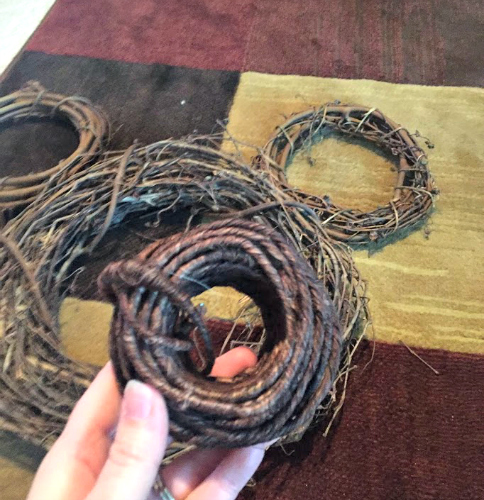
To secure the ears to the head, you will need to find some kind of wire. I actually set out to get floral wire but I saw this brown twine wire and it matched really well to the grapevine wreath.
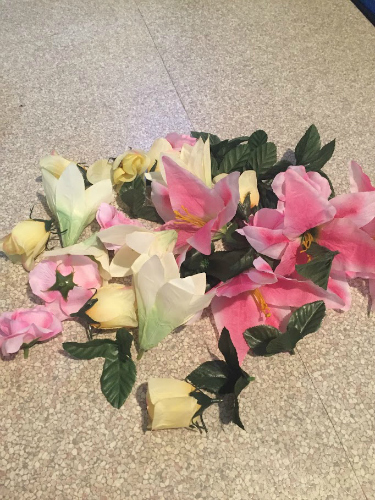
For the flowers, I went to my local dollar store. They had a whole wall of summer flowers right now and they were all of course a dollar! The flowers I purchased were pinks, whites, greens, and yellows. That was just the look I was going for, you can get anything you want that fits your needs.
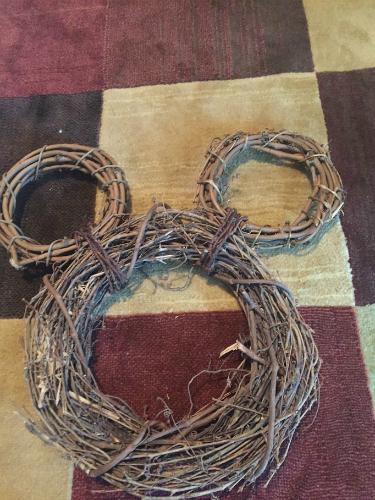
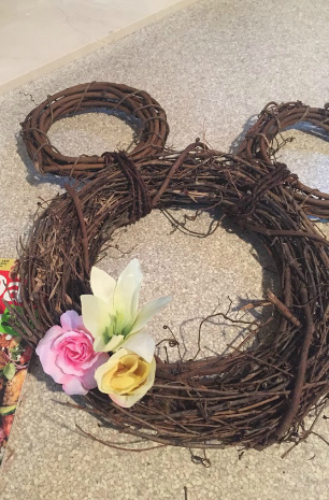
Step 2- Attach the Ears to the Head
Lay the three wreaths out in the shape of the Mickey Head on the floor. Make sure your ears are equal distance to each other. I just eyeballed this step, but you can also measure the distance out.
Grab your wire to attach the ears. I used brown twine wire, but floral wire would work great too, you will be covering up the wire. I did not measure out the length of my wire, I just pulled out a good length. The excess can always be cut off.
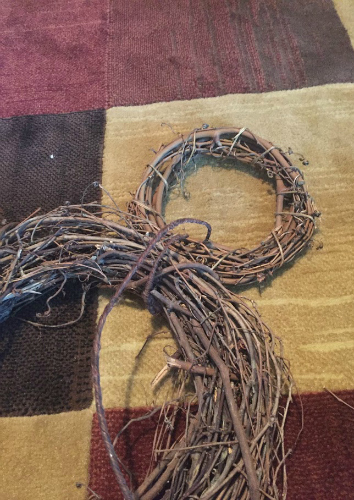
Put the first ear at the spot you want it on the head and hold it in place. Next, with one end of the wire, wrap it around a piece of the grapevine to secure it in place. This will keep the wire tight and it won’t come undone. After it is secured, begin wrapping it around the head and ear. Make sure you are wrapping it really tight and keep holding the ear in place so it’s straight.
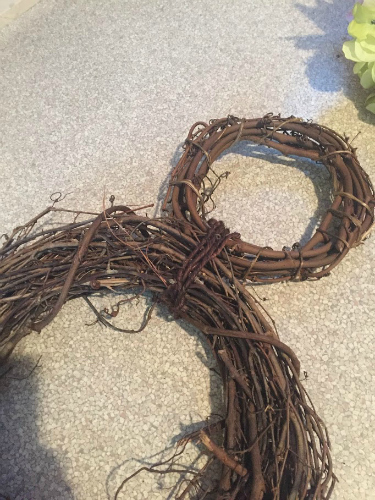
Once you have the first ear done and it is secure, move on to the second ear. Follow the same steps as above. When the second ear is done, pull on the ears a little to make sure they aren’t going to move around and change positions.
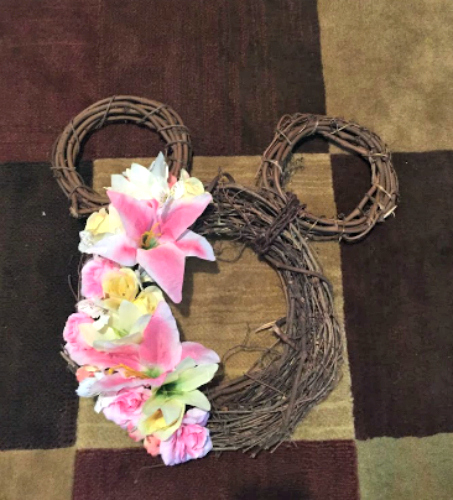
Step 3- Add Decorations
Now that the ears are on and secured, it’s time to add your decorations. I wanted to use flowers and ribbon. I made this wreath for spring/summer time, so that is why I am using bright colored flowers. This could easily be adapted for any time of year and any kind of decorations. To prep my flowers, I pulled them off of the stems for easy access.
Before gluing anything down, you might want to set your decorations on the wreath so you can get an idea of what you want the end product to be.
Heat up your hot glue gun and begin gluing down all your decorations. I wanted all my flowers to be off to one side and close together. There are so many ways to change up how you put them on, so you don’t have to do what I did. A good tip, if you want to use this wreath all year around, don’t use a hot glue gun. You can attach your decorations with floral wire and change out your decorations for each season.
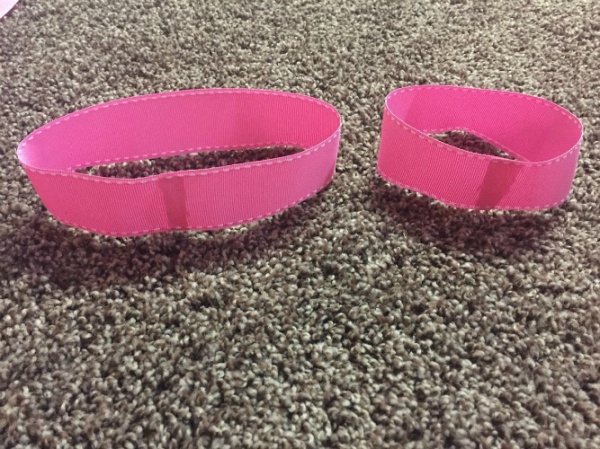
Step 4- Adding the Bow (optional)
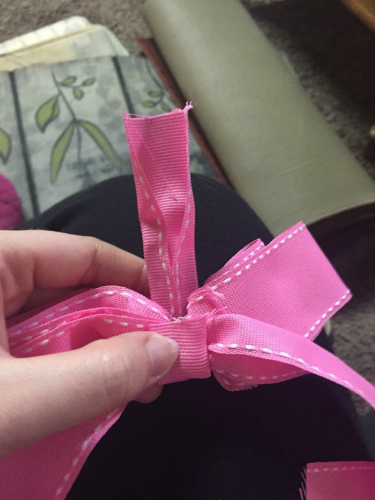
Since I added flowers only on one side of the Mickey Head wreath, I needed to hide the brown twine wire on the other side. I decided a bow would be perfect for the look I was trying to achieve. My grandma was a bow making master and could make beautiful bows and I sadly did not inherit that trait! Therefore, I needed an easy to do bow. Mostly I used my glue gun to hold it together. If you are great at making bows, you can skip this next part. If you are like me and have no skills in making bows, follow my tips!
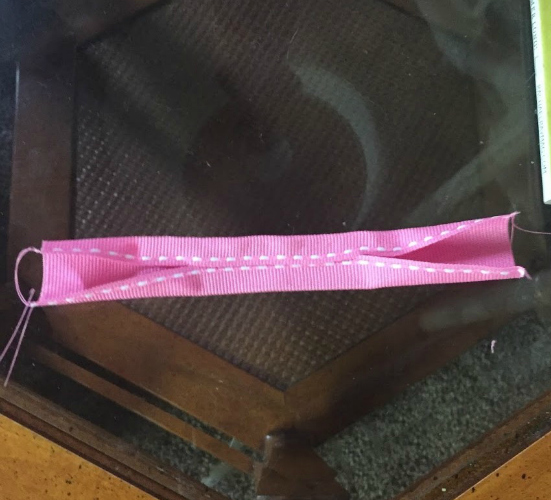
With your ribbon, cut out 4 strips: 1 six inch strip, 1 twelve inch strip, and 2 sixteen inch strips. If you want the bow bigger or smaller, you will have to play around with the lengths.

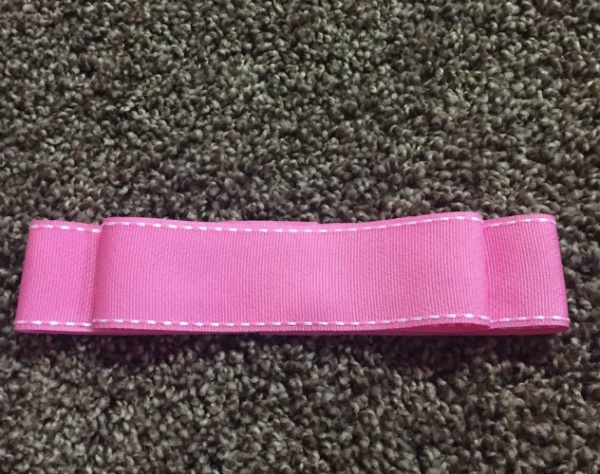
Take the twelve inch strip and one of the sixteen inch strips and with your hot glue gun, glue the ends together to make a circle
Flatten the two circles out and lay the smaller circle on top of the larger circle.
With your fingers, pinch the middle of the two circles together. With the floral wire, wrap around the center to keep it tight.
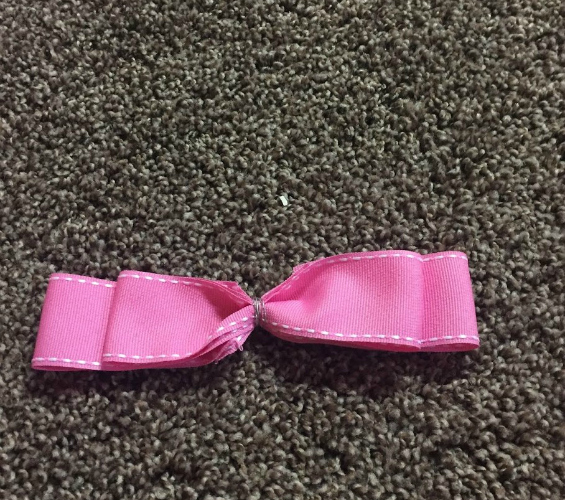
Grab the other sixteen inch strip and pinch the middle and lay it on the back of the bow. With the floral wire, attach the strip to the bow so the long sides hang down from under the bow.
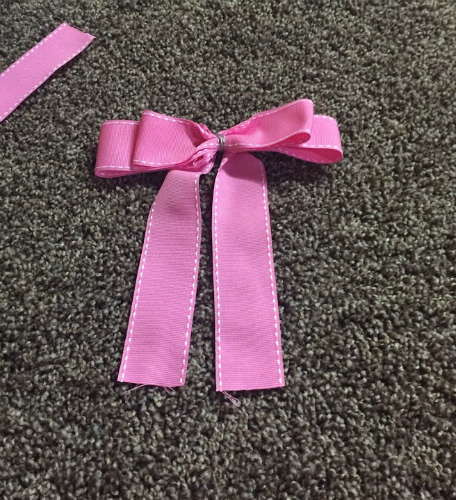
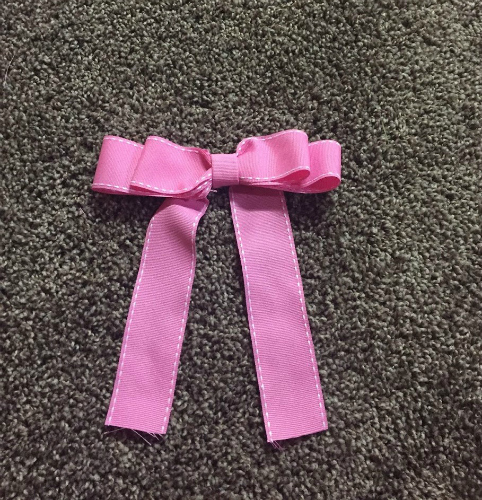
Next take the last strip of ribbon and hot glue the ribbon in half.
This strip will go around the middle of the bow to hide the floral wire. Take the first end and hot glue it to the back of the bow. The end will need to be trimmed so it doesn’t hang over.
Trim and glue the second end down on the back. Turn the bow over, and fluff your bow! The ends of my bow were fraying a little, so I took some hot glue and folded up the ends to make it a cleaner look. Once you have your finished bow, hot glue it to your wreath. I used mine to hide the wire.
Step 5- Hanging the Wreath
I cut a long strip of my ribbon to make a hanger for my wreath. I did not measure because I was not sure how long I wanted my wreath to hang. Hold the ends together and hang from your wreath hanger to see what length you like. I hot glued the two ends together to make the ribbon hanger. There are multiple ways you can do this, so play around with it and see what looks good. If I was good at making bows, a bow at the top would be really cute!
Once you have everything how you want to it, hang your finished Mickey Head wreath!
My Mickey Head wreath is very spring/summer related so I wanted throw out some other ideas that might work for other times of year.
- Fall flowers with gourds
- Adding a name initial wooden letter
- Pine and poinsettias
- Pastel flowers
- Disney stuffed animals
- Tulle and burlap
- Ornaments
- Mickey head pumpkins
Those are just a few ideas. Have fun with it and make it your own special Mickey Head wreath! I would love to hear from you in the comment section and share your ideas for other The Mouse For Less readers for making a Mickey Head wreath!
Did you like this article? Make sure to share it with your friends! Check below for easy ways to share!
Incoming search terms:
- how to make a mickey wreath
- mickey mouse wreaths to make
- diy mickey wreath
- how to make a disney fall wreath
- how to make a disney teine wreath
- https://www themouseforless com/blog_world/how-to-make-a-mickey-head-wreath/
- sizes of wreath frames needed to make diy mickey wreath