One of the exciting things about going to Walt Disney World is the countdown that leads up to the magical vacation. To make this process even more magical, I made three different DYI Disney countdowns for our upcoming June vacation. Below are the details for each! Go ahead and get creative.
Countdowns for My Kids
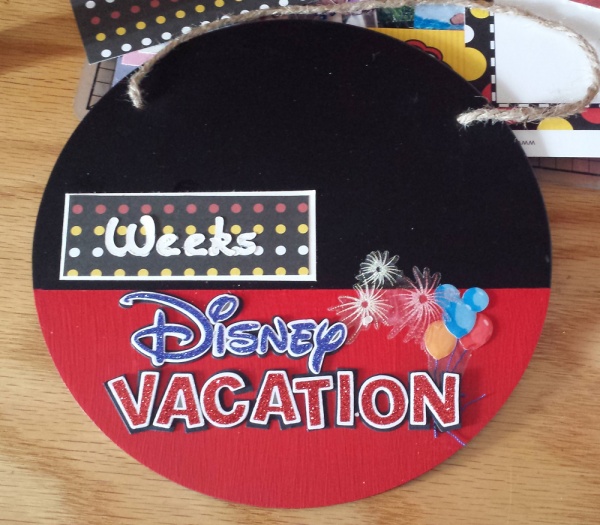
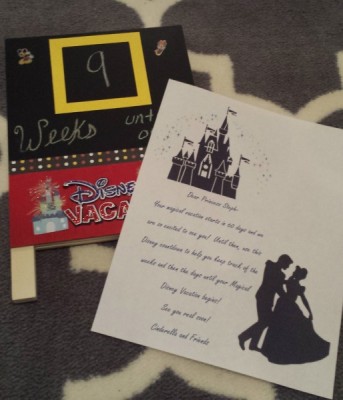
This one is for my two kids (8 and 6) and will hang on the door to their bathroom.
What you need:
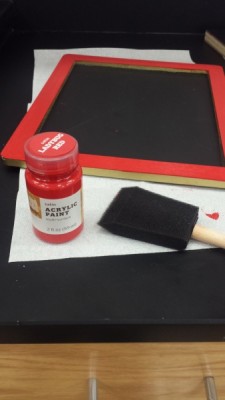
- One chalkboard (I got mine from the dollar bin at Target )
- Disney Vacation sticker (Amazon)
- Disney ribbon (Amazon )
- Red paint and paintbrush (Target )
- Colored paper and letters
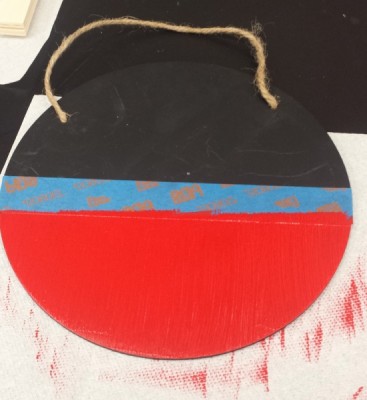
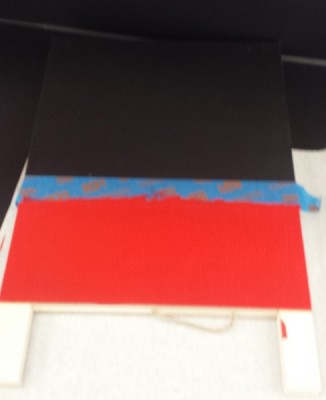
I started by painting the bottom section red. I used painter’s tape to make it easier to just paint without being super careful; however, it did need about three full coats of the red paint so this part took the longest.

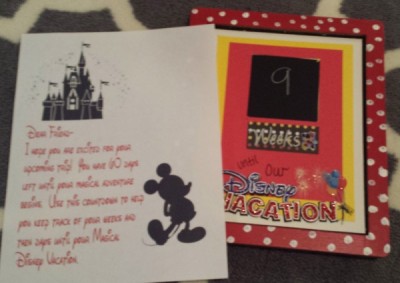
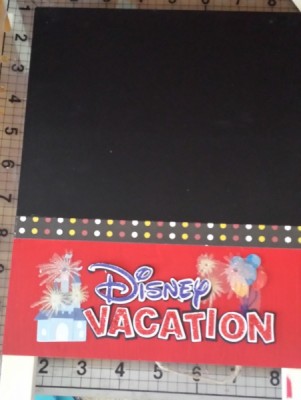
Added the sticker and the “weeks” paper
Next, I added the Disney Vacation sticker to the bottom section. I didn’t use the castle that was included in the package as it seemed too busy.
I wanted to make sure my kids could start with counting down our weeks and then days as we get closer. I didn’t want to have to change it everyday for the next 60 days so being able to switch from weeks to days was important to me. I decided to make two small pieces using a cutting machine I could add the words “weeks” and “days” and the kids can then change it on the chalkboard later.
Once this was done, it became about the small details. I wrote on “until” and “our” with sharpie and a glitter pen. Some places showed stickers but writing it seemed to add more of a personal touch to it.
Finally, I just added the ribbon and then clipped the “days” piece to the ribbon for later.
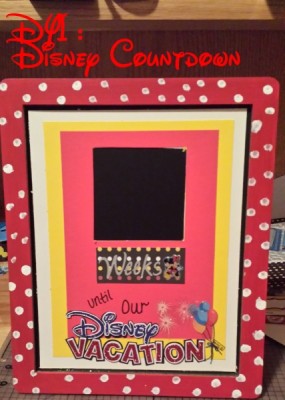
Countdown for my mom
This one if for my mom because everyone needs a little Disney magic in their world.
What you need:
- One chalkboard frame (I got mine from the dollar bin at Target )
- Disney Vacation sticker (Amazon)
- Disney ribbon (Amazon )
- Red and white paint and paintbrush as well as q-tips (Target )
- Colored paper and letters
I started this one by again doing two to three coats of red paint around the outside of the frame. Once the red was dried, I used q-tips to create the white dots around the frame to make it look like poke-a-dots. When the painting was done, I moved onto designing the inside.
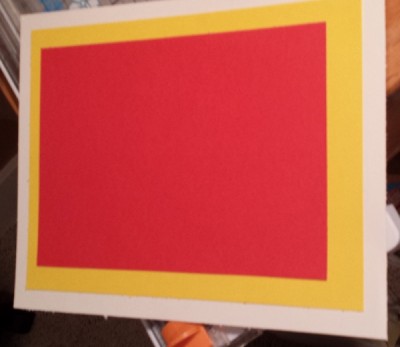
Regular cardstock for center
For the inside I used just regular cardstock paper for the white, yellow and red. After adding the Disney Vacation sticker, I then created the “weeks” and “days’ pieces just like I did for my kids. I wanted my mom to be able to decide if she wanted to just countdown weeks or to do days as well.
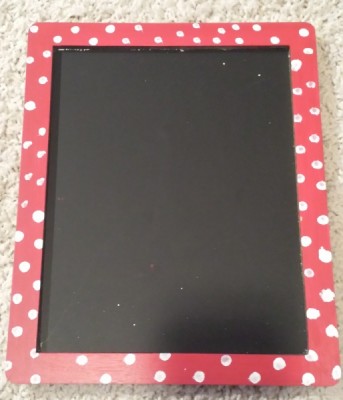
Shows the dots
It was quick and easy, but will add some Disney magic for my mom as we wait for our trip in June.
Countdown for my sister
The final countdown is for my sister who is also coming on the trip in June. Her countdown is a chalkboard easel.
What you need:
- One chalkboard easel (I got mine from the dollar bin at Target )
- Disney Vacation sticker (Amazon)
- Disney ribbon (Amazon )
- Red paint and paintbrush (Target )
- Colored paper, letters, and fun Disney stickers
Show easel
I started making this countdown by once again painting 2-3 coats of red on the bottom half of the easel. Using painter’s tape made it super easy to keep the red paint where I was suppose to be.
Once it was dried, I added the Disney vacation sticker to the bottom of the red section. Once I did this, I felt it needed something a little more, so I added a ½ inch strip of pattern paper from my Disney collection. The dots just added a little bit of colored I felt and tied the red bottom to the yellow square. I added the yellow cut out square to give a specific spot for the numbers on the countdown. By doing this, it made the top feel less opened and more connected to the rest of the countdown. On this countdown, I didn’t want to add any more paper embellishments so I just wrote with the chalk to finish it.
Added sticker and paper
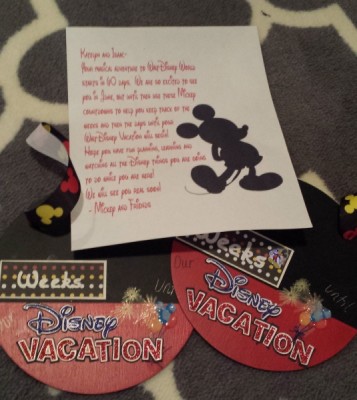
Overall I am pleased with how well these three countdowns turned out. They aren’t perfect by any means, but they will add Disney magic to our wait. To finish them all off, I typed up a letter from Mickey to add just a little more Disney magic. Hope these give you some ideas of how you can create your own Disney countdown. Happy planning!
What do you do to help count down your vacation? Share in the comments.
Incoming search terms:
- red paintbrush in disney world