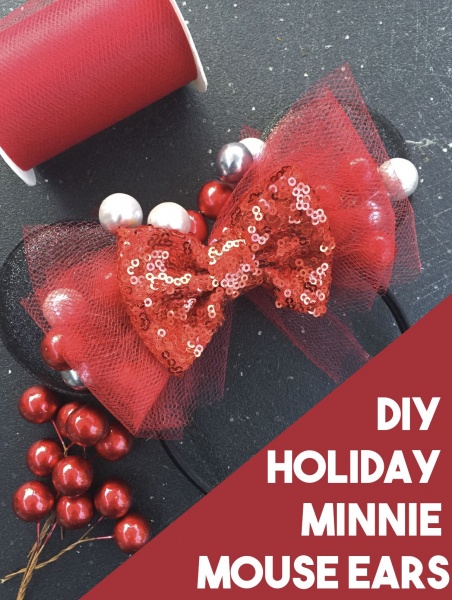
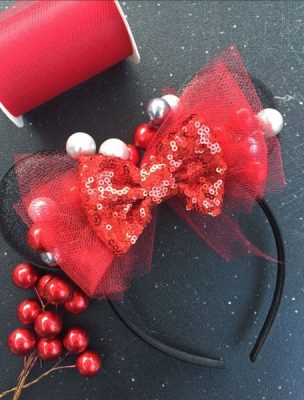
DIY Holiday Minnie Mouse Ears! Easy as One, two, three! Finding the perfect ears to round off a Disney Christmas card might be hard but these Easy DIY will top it off!
ESTIMATED TIME: 15 min
DIY Holiday Minnie Mouse Ears! Easy as One, two, three! Finding the perfect ears to round off a Disney Christmas card might be hard, but these Easy DIY ears will top it off!
ESTIMATED TIME: 15 min
ESTIMATED COST: 8 Dollars
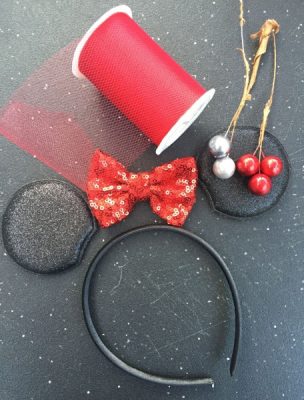
SUPPLIES:
- Headband
- Premade Minnie foam ears- I find mine on etsy and usually for under 3 dollars for the pair!
- Tulle
- Bow
- Mixed color floral ball picks – normally in craft stores right after Halloween
- Glue gun
STEP ONE: Using the glue gun, place glue on the bottom of each glitter foam ear. Place them to the back of the headband. I like to do one at a time, blowing on the glue to allow the glue to dry. I kind of just eye ball where I want the ears to be placed but you could measure if you would like.
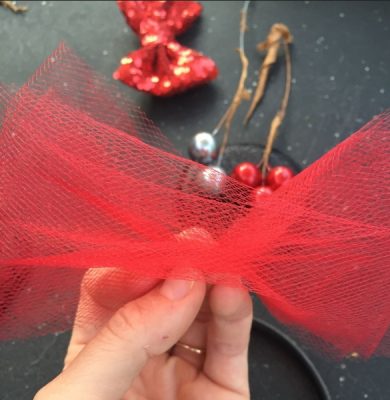
STEP TWO: Create the larger bow out of Tulle. While the tool is still on the spool, wrap the tulle around an object that is about the size you would like the bow. I normally wrap around 4-5 times so that the tulle has a strong color to it. Cut the tulle off of the spool, pinch in the middle to create the bow effect. I like to use a piece of the same tulle to tie in the middle.
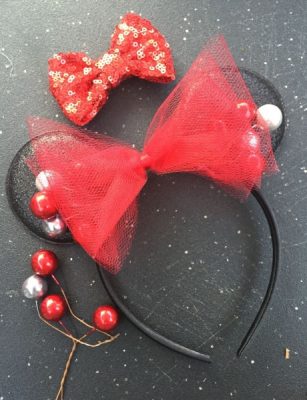
STEP THREE: Glue the purple glitter bow on top of the tulle bow and place on the top of the head band. Remember to always let the hot glue dry before moving on to the next step and you don’t want “hot glue hairs” on your head band. Once you have the bow placed you can use the wire from the floral balls and wrap it around the base of the head band. I made a second tulle bow and glued to the back of the headband to hide the wires.
You can use this tutorial for the base of many different floral pick inspired Minnie Mouse Ears! We would love to see how you were inspired! Share them on Facebook or Twitter.
Did you like this article? Make sure to share it with your friends! Check below for easy ways to share!
Want to visit a Disney Destination? Contact The Magic for Less Travel for more information and a free, no-obligation quote.