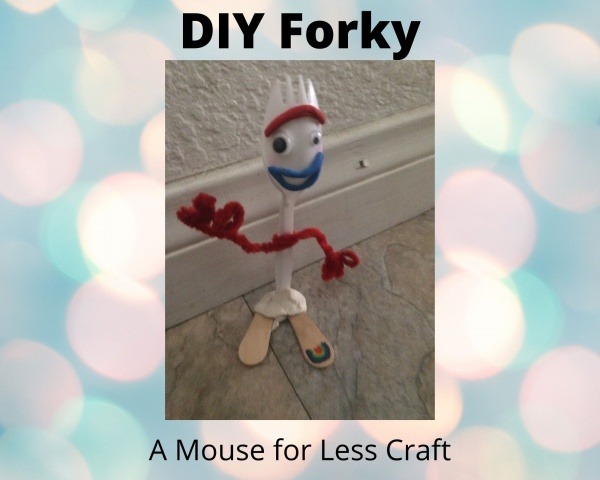

Our homemade Forky!
For me, the standout character in Toy Story 4 is definitely Forky, the toy that imaginative Bonnie makes out of trash and rejected craft supplies. Shortly after we all saw the film, my mom mailed my daughter some sporks and craft supplies so that we could make our own Forky!
Here’s what you’ll need:
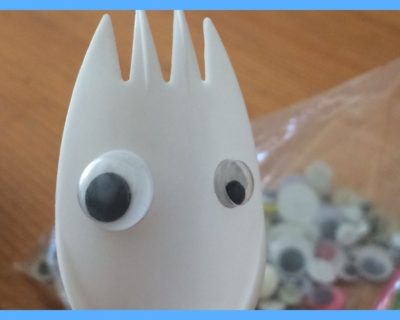
- A spork
- A rounded popsicle stick (we used popsicle sticks from Julie’s Organic)
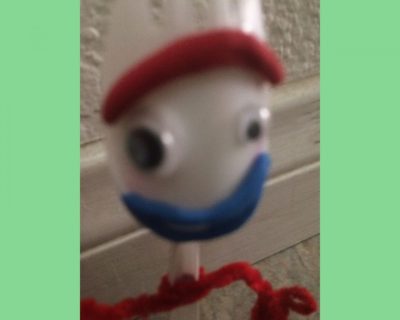
- Red pipe cleaner
- Googly eyes in two different sizes
- Shaping compound (modeling clay) in white, blue and red
- Pink highlighter (we used a Bic Brite Liner)
- Small rainbow sticker or colored markers
STEP ONE:
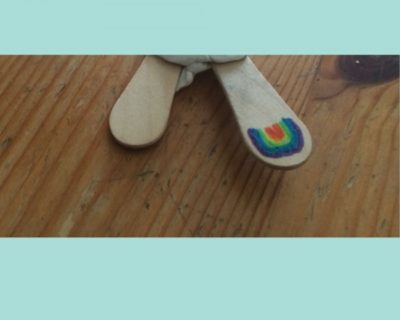
Cut a popsicle stick in half. On one half, either use a rainbow stick or color a rainbow with markers. Forky has this rainbow on his left foot. If you want, write half of your name on the bottom of one foot, and the other half on the other, just like Bonnie did!
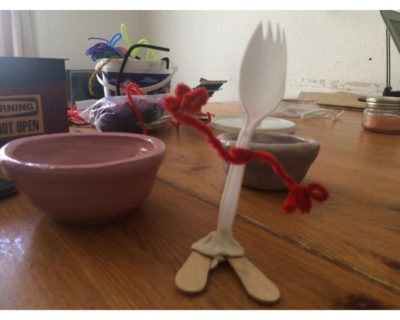
Next, use modeling clay to attach these to the bottom of a spork as “feet.” Try your best to keep Forky in position as it dries. Otherwise, he might be a little loose. (Which is not the end of the world.)
STEP TWO:
Take a long red pipe cleaner and twist it, at the middle, around the stem of the spork. Create three-fingered hands by molding the ends of the pipe cleaner.
STEP THREE:
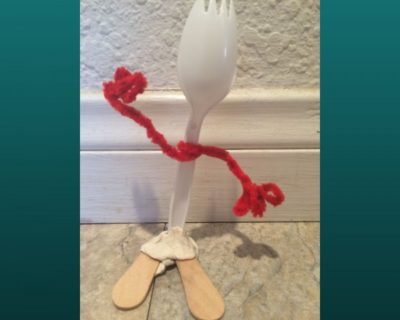
Attach googly eyes to the rounded portion of the spork. Forky has his right eye larger than the left. Self-adhesive eyes may or may not work because of the curve in the spork. (It worked for us!) If your eyes are not self-adhesive, glue dots work well.
STEP FOUR:
Color Forky’s cheeks with the highlighter, and then smear them slightly with your finger. (And then wash your hands!) This may or not rub off your Forky.
STEP FIVE:
Use a thin strand of red modeling clay to make Forky’s unibrow. Use a thin strand of blue modeling clay to make his mouth. Remember that you can pick whatever expression you want!
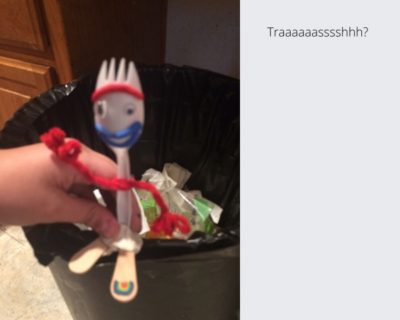
STEP SIX: Spend hours trying to get your Forky to not jump in the trash.
Have you made a Forky? Share yours with us on Facebook or Twitter!
Did you like this article? Make sure to share it with your friends! Check below for easy ways to share!
Want to visit a Disney Destination? Contact The Magic for Less Travel for more information and a free, no-obligation quote.

Incoming search terms:
- https://www themouseforless com/blog_world/diy-forky/
- https://www themouseforless com/blog_world/diy-forky/#:~:text=Forky has this rainbow on other, just like Bonnie did!