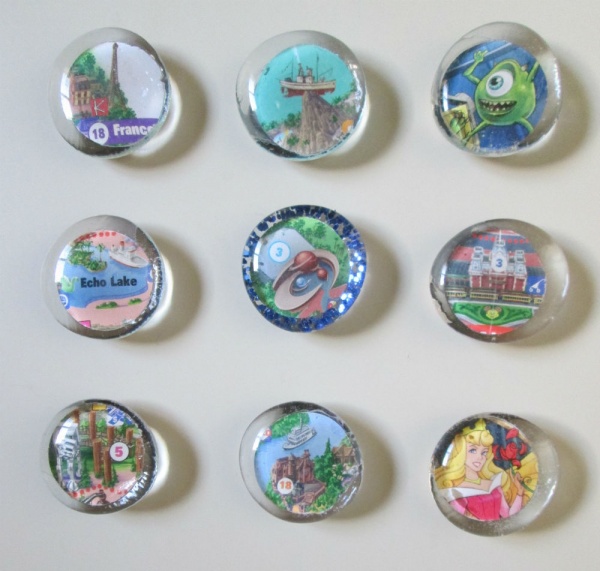
We like to add a touch of Disney to every day, and when we saw a DIY magnet craft featured by Erin Glover on the Disney Parks Blog we knew that this would give us a way to nicely display Walt Disney World maps!
In order to make the magnets, you need:
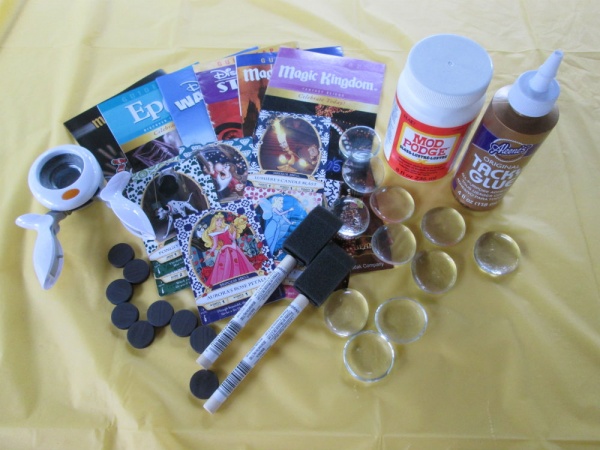
- Clear one inch glass stones with a flat side. I found these in the floral department of a craft store.
- A one inch circle paper punch, which can be found in the scrapbooking department of a craft store, or a pair of scissors. We preferred to use the paper punch.
- Small round magnets
- Mod Podge or another type of decoupage glue
- Foam brushes for the Mod Podge or decoupage glue
- Tacky Glue or a glue gun with glue sticks
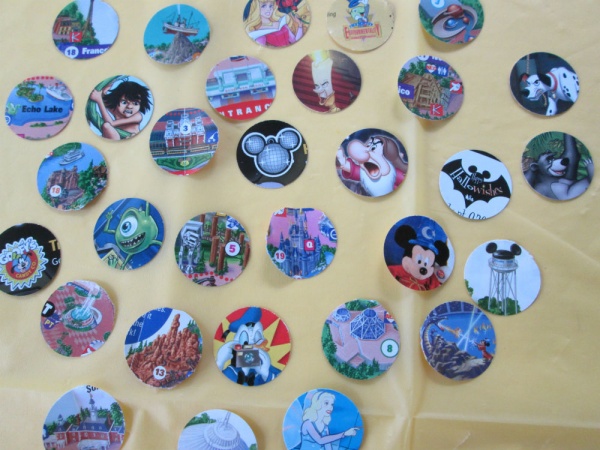
- Old Disney maps or any other items with small pictures you can use. We used Walt Disney World maps and some Sorcerers of the Magic Kingdom cards.
- Glitter (optional)
Here are the instructions:
Cut out the images you want to use. These circles should be just slightly smaller than the glass stones.
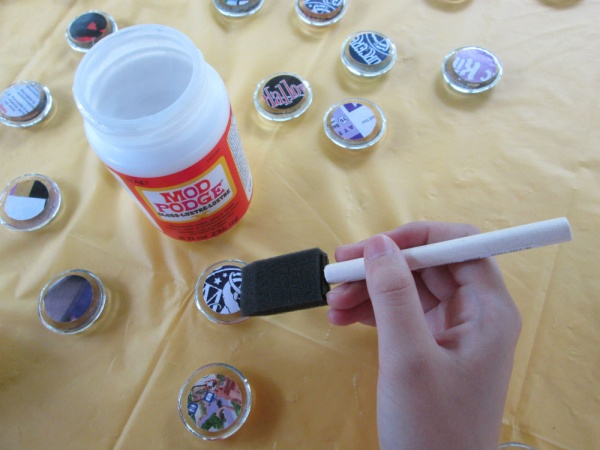
Use the Mod Podge with a foam brush to glue the cut out circle to the back of the stone. Make sure that the image you want to see on the magnet will show through the round side. Let this dry for a couple of hours before continuing with the next step.
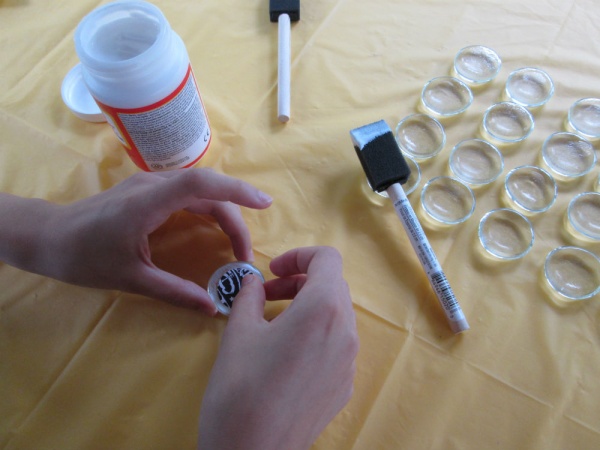
Use the Mod Podge and the foam brush to paint a thin layer of glue over the whole back of the magnet. This will hold your circle cut out in place.
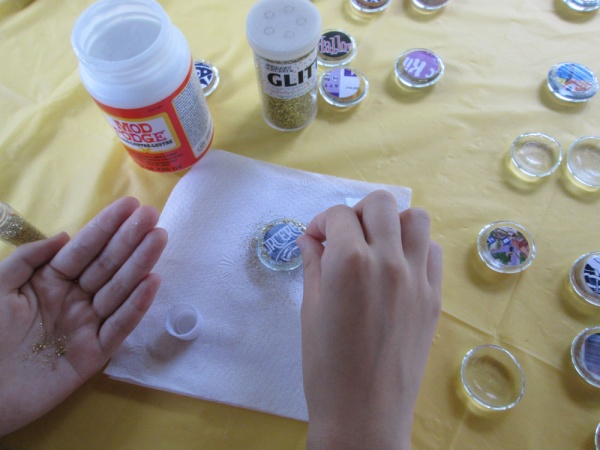
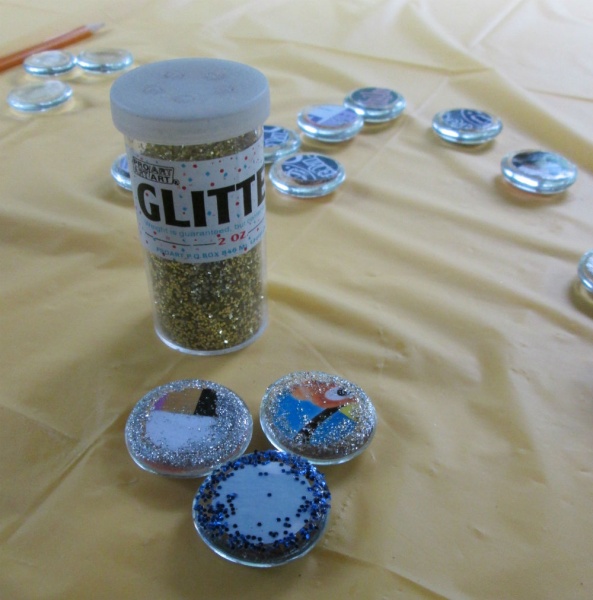
We decided to add some pixie dust to our project, so for a few magnets we added glitter around the edge of the stones. If you do this, make sure only the edges are covered with glitter so later you can glue the magnet on a smooth surface. Add one more layer of Mod Podge on top of the glitter after the glitter is dry.
Tip: When working with glitter, put the Mod Podge in a cup so glitter does not get into your Mod Podge container.
Again, wait a couple of hours to let this dry before continuing with the next step.
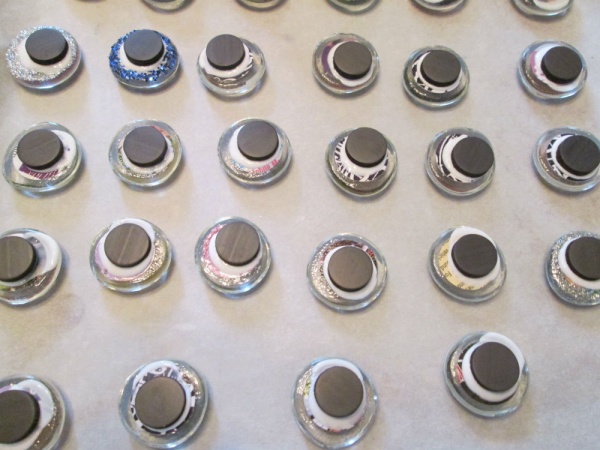
Use the Tacky Glue or a glue gun to attach your magnets. We encountered a small mishap with this step. At first, we set the finished magnets too close to each other. We may have used too much glue, too. The magnets were drawn to neighboring magnets, so we had to space them away from each other during the drying process. Allow the magnets to dry completely before using them.
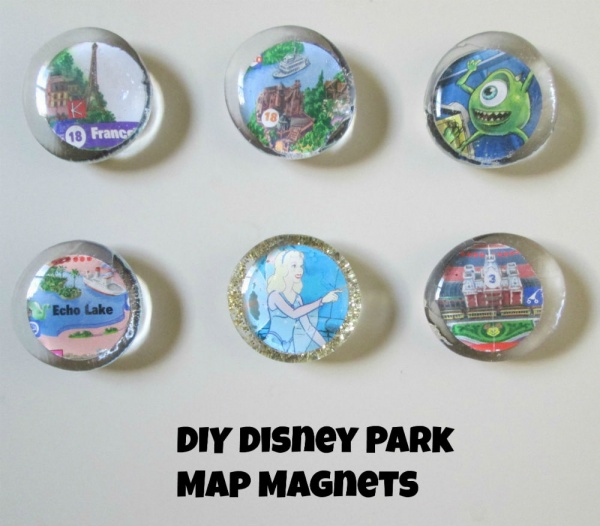
These were enjoyable to make, and I love the way that the images are magnified under the glass! This would be a good craft to do with kids during summer vacation, or just for fun any time. The magnets with glitter added some sparkle to the finished product and turned out great! Using the Sorcerers of the Magic Kingdom cards turned out well, too. In addition to adding a touch of Disney to your refrigerator, the magnets could be used as party favors, small gifts, or as fish extenders for the Disney Cruise Line. We give a big thank you to Erin Glover and the Disney Parks Blog for inspiring us to show our Disney Side with these magnets!
Incoming search terms:
- disney magnets home made
- https://www themouseforless com/blog_world/diy-disney-themed-magnets/