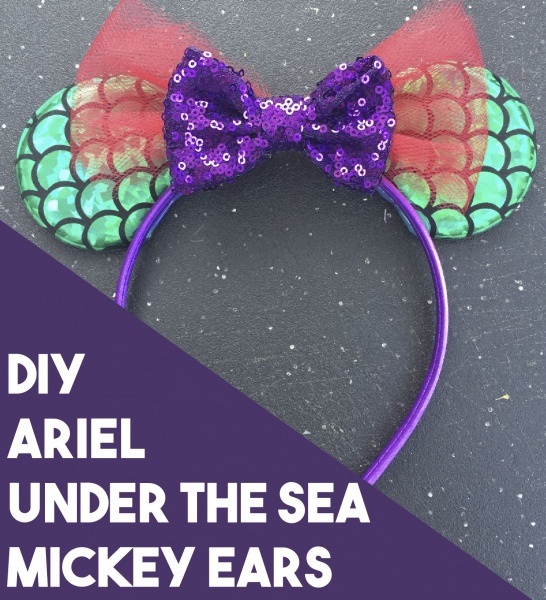
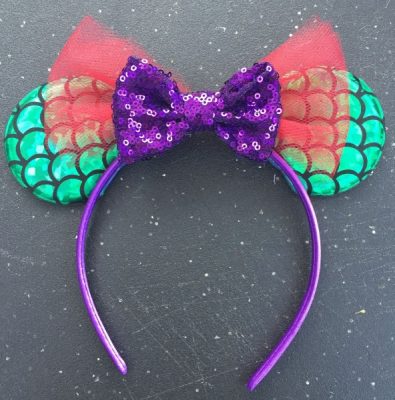
All your The Little Mermaid friends will be “swimming” over these fancy ears. All little girls dream of being Ariel at some point. Make their dream come true with these Ariel/The Little Mermaid inspired Mickey Mouse ears!
ESTIMATED TIME: 15 min
ESTIMATED COST: 8 Dollars
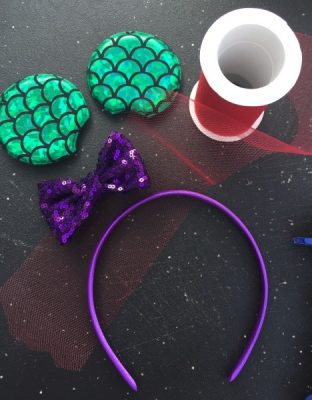
SUPPLIES:
- Head band
- Premade Mickey Mouse foam ears- I found this pair on Etsy. Usually I can find them for under three dollars for the pair!
- Tulle
- Bow
- Glue gun
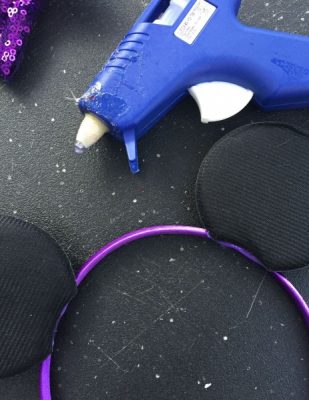
STEP ONE: Using the glue gun, place glue on the bottom of each glitter foam ear. Place them on the back of the head band. I like to do one at a time and blow on the glue to allow the glue to dry. I tend to use the “eyeball” method to choose where the ears are placed, however you could choose to measure, if you would like.
STEP TWO: Create the larger bow out of tulle. While the tulle is still on the spool, begin to wrap it around an object, that is about the size you would like the bow to be. I normally wrap the tulle around 4 to 5 times, so that the tulle has a strong color to it. Cut the tulle off of the spool, pinch it in the middle to create the bow effect. Using a piece of the same tulle, tie it around the middle to hold the bow shape.
STEP THREE: Using the glue gun, glue the purple glitter bow to the top of the tulle bow. Place the bow on the top of the head band. Remember, always let the hot glue dry before moving on to the next step.
Change up the tulle colors and bow color if you are want to make Ariel ears, as well as her sisters!
Did you like this article? Make sure to share it with your friends! Check below for easy ways to share!
Incoming search terms:
- https://www themouseforless com/blog_world/diy-ariel-mickey-ears/