
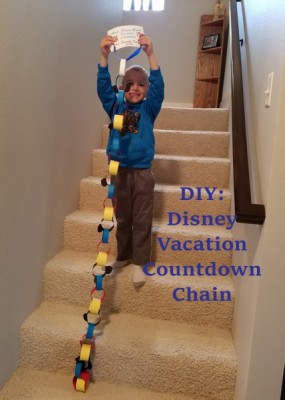
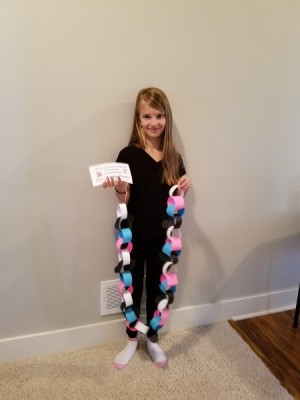
Isaac with his chain
In my last blog post I talked about how one of the things I love most about planning a Walt Disney World vacation is the excitement leading up to it. So far our family has created DIY chalkboard countdowns, and DIY autograph books. This week, to add to the excitement, my kids helped make countdown chains for our upcoming June trip. It was super easy and this is how we made them!
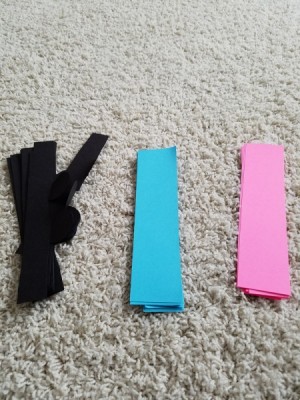
Step One: Cutting Strips of Paper
First we started by cutting pieces of paper into 1 to 1 1/2 inch strips.
For Minnie Mouse we used: white (separator), teal (body), and pink (shoes)
Colors Used for Minnie Mouse Chain
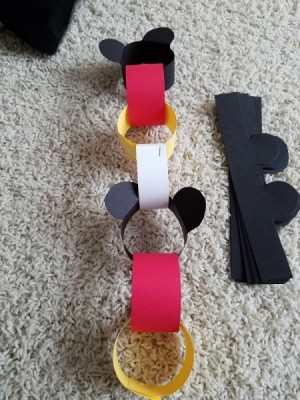
For Mickey Mouse we used: white (separator), red (body), and yellow (shoes)

Colors Used for Mickey Mouse Chain
Although you can make them all different widths, we just kept it easy by making them all the same size for our purpose.
Step Two: Make Ears
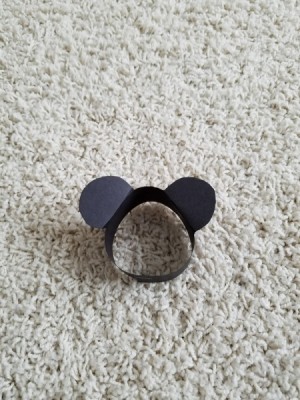
How to Make Ears
The ears for Mickey and Minnie we cut the black strips to around 2” wide and then traced ears onto all of them. After you have the ears cut out, you fold the ear flaps up to make it look like Mickey and Minnie ears when on the chain.
Step Three: Connect the Pieces
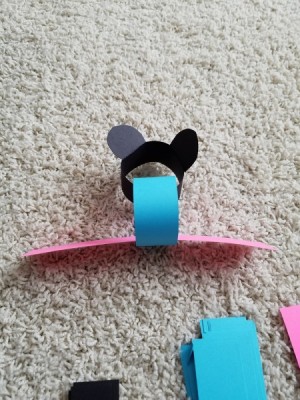
Connecting the Pieces
After getting them cut, we start to clip them together. After a few trial and errors, we decided that stapling was more efficient and stayed better than glue or tape. Another tip I would offer, I found it easier to make one whole “Minnie” at a time (black, teal, and then pink) and then use the white papers to link them all together at the end. This seemed to go faster than doing it all together.
Connecting it All
Step Four: Top it Off
For the top of the chain, I printed a quick 4 by 6 paper on cardstock that just said “Disney World Vacation Countdown” with pictures of the four parks. I then paper punched two holes, put ribbon through the holes as well as the top link before taping the ribbon on the back of the card. We used the ribbon then to hang up in their rooms.
Step Five: Add Magic
A way to make the chain a little more fun is to add Disney magic to the back of different links. You can do ride trivia, movies to watch, activities to do really anything for the kids to think a little more about Disney.
Katelyn with Her Minnie Chain
That is all! It was a fun activity and the kids love being able to take off a link each morning and I love how Disney they look. These easy DIY activities are such a fun way to get kids involved and excited about their Disney World Vacation ahead of time.
Happy creating and planning.
What’s your must do when counting down the days? Share in the comments.
Incoming search terms:
- disney countdown chain
- disney world countdown to do for kids